Getting Started
This guide walks you through training your first Forgather model from the CLI. It assumes Forgather is already installed — if not, start with Installation (host venv via pip / uv, or the bundled Docker images — see Docker images for the full reference).
Prefer a web UI? Forgather ships with a single-user web frontend over the same APIs the CLI uses — project browsing, queued training, live GPU monitoring, log viewing, an in-browser editor, and a chat client against served models. If that sounds more useful than the CLI to you, jump straight to the Forgather server walkthrough — it's an end-to-end tour from a fresh install to chatting with a small model you train along the way.
Your first training run
The tiny_llama tutorial trains a ~4M parameter Llama model on a subset of the
TinyStories dataset. On a single RTX 4090, this takes about three minutes.
For a complete walkthrough — including TensorBoard monitoring, loss plots, text generation, and programmatic model loading — see the Tiny Llama tutorial.
List available configurations:
Train:
Training downloads the TinyStories dataset on first run, then prints loss,
learning rate, and other metrics at each logging step. Artifacts are saved under
output_models/tiny_llama/.
Summarize the results:
Run an evaluation:
Results are written to output_models/tiny_llama/evals/ as Markdown and JSON.
Key CLI commands
| Command | Description |
|---|---|
forgather ls |
List available configurations in the current project |
forgather ls -r |
Recursively list all projects and configs |
forgather index |
Show project overview as markdown |
forgather -t CONFIG pp |
Preview the fully-expanded configuration |
forgather -t CONFIG train |
Train with the given configuration |
forgather -t CONFIG tb / forgather tb --all |
Launch TensorBoard on this config's runs / every run |
forgather logs summary |
Print summary statistics for the latest training run |
forgather logs plot |
Generate training metric plots |
forgather -t CONFIG eval test NAME |
Run a named evaluation config on the trained model |
forgather inf server -c -m PATH |
Start the inference server (-c = load latest checkpoint) |
forgather inf client |
Start the interactive inference client |
forgather control list |
List running training jobs |
forgather control stop JOB_ID |
Gracefully stop a running job |
forgather checkpoint link |
Symlink latest checkpoint for plain from_pretrained loading |
forgather -i |
Start an interactive shell with tab completion |
Run forgather --help or forgather <command> --help for full usage details.
Interactive mode
For day-to-day work, running forgather -i launches an interactive shell that is
often easier to use than invoking forgather repeatedly from your normal shell.
It provides:
- Tab completion for configuration names, commands, and arguments
- Persistent current template -- set it once with
config baseline.yaml, then runpp,train, etc. without repeating-t baseline.yaml - Project-specific command history (stored in
.forgather_history) - Editor integration -- the
editcommand opens template files directly in VS Code or vim, with multi-file selection
forgather -i
forgather> ls                             # List available configurations
forgather> config train_tiny_llama.yaml   # Set current template
forgather> pp                             # Preview configuration
forgather> train                          # Train
forgather> edit                           # Open templates in your editor
When running in a VS Code terminal, the interactive CLI automatically detects VS Code and opens files as editor tabs. This makes it easy to inspect the full template inheritance chain while working on a configuration.
For the full guide, including vim clientserver setup and multi-file editing, see the Interactive CLI Guide.
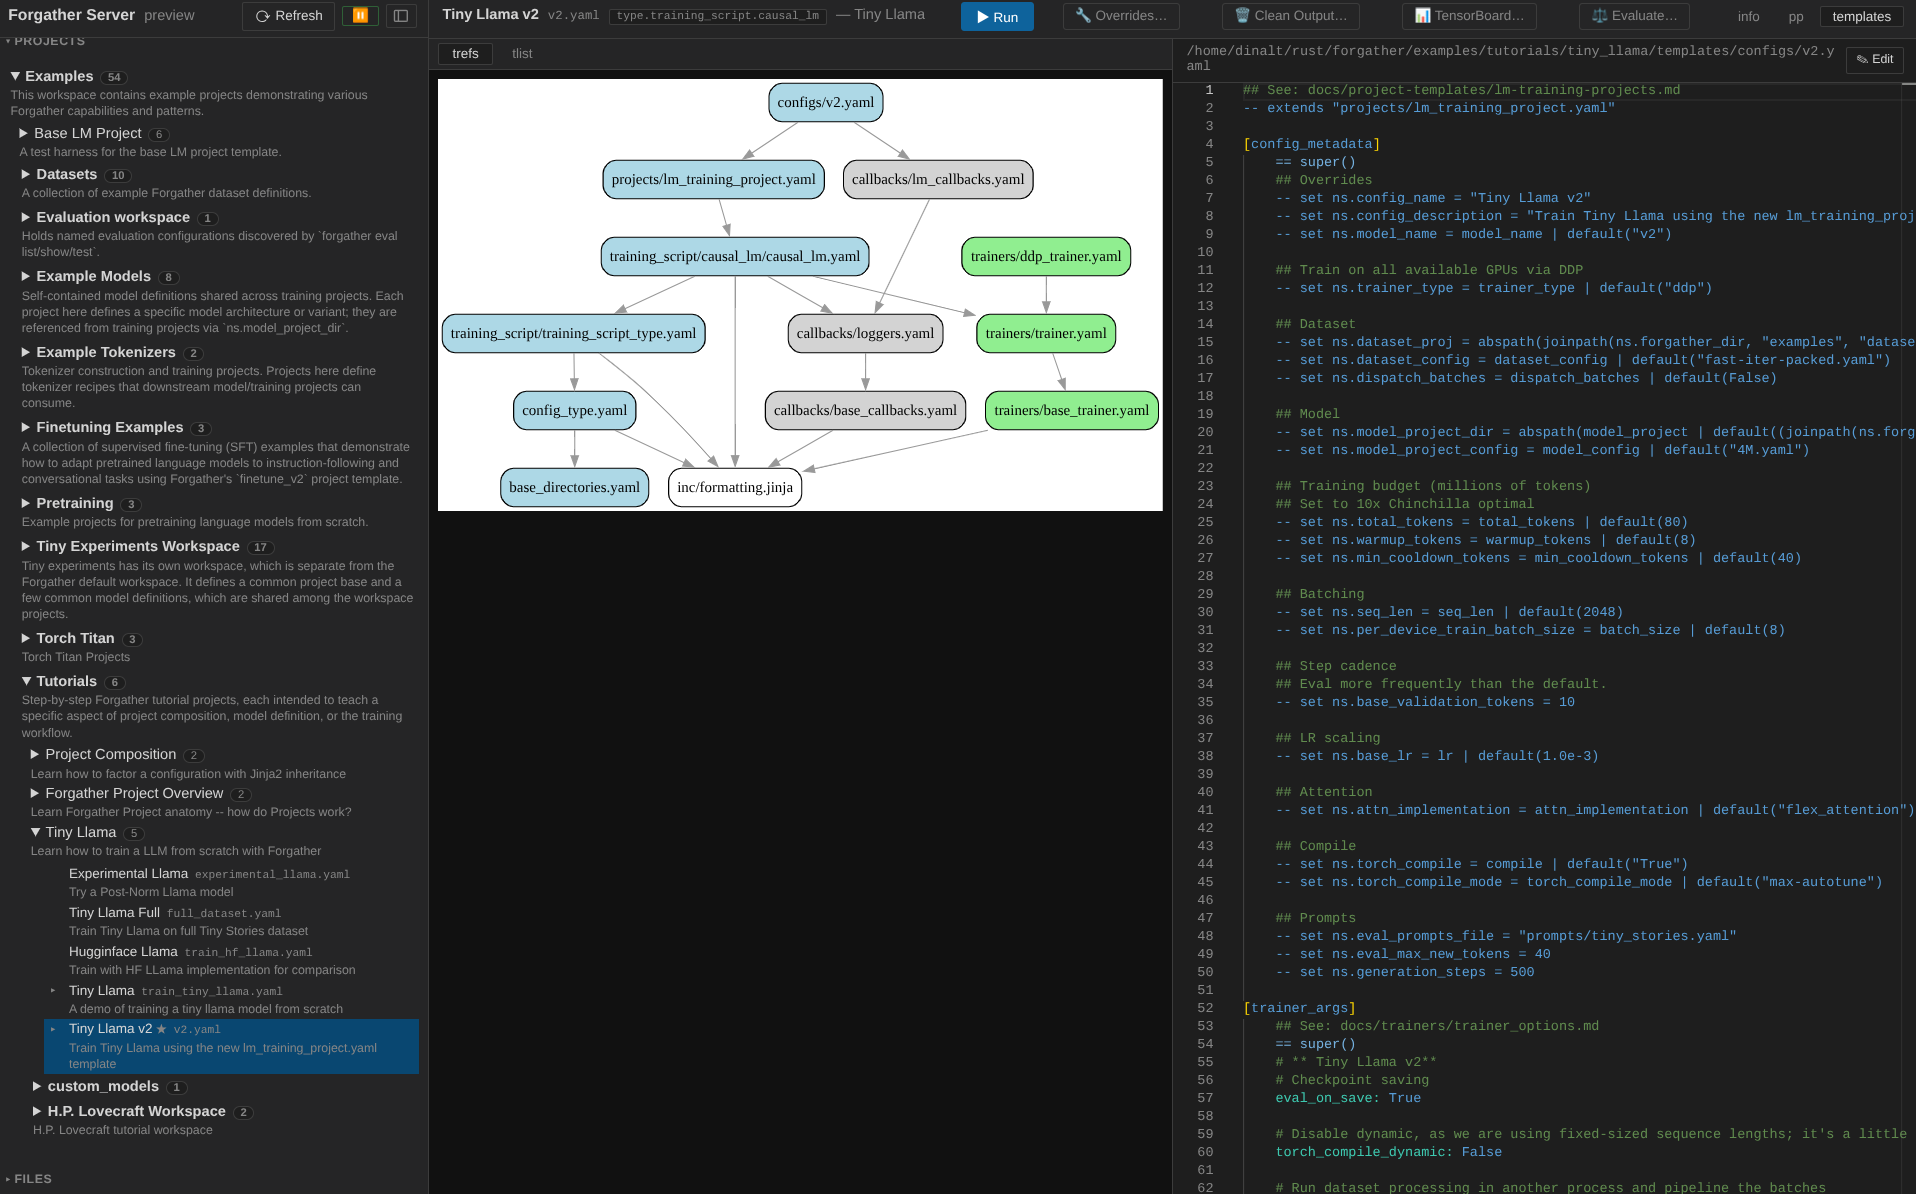
Running the Forgather server
forgather server launches a local web UI that wraps the same APIs
the CLI uses — project / config browsing, queued training runs, GPU
monitoring, log viewing, an in-browser editor for templates and
arbitrary text files, and a chat client against served models. The
server is single-user, localhost-first; it binds to 127.0.0.1 by
default and ships with no auth.
Build the web UI
The web UI is a Vite/React SPA and isn't pre-built into the repo. Before starting the server, run the helper from the repo root:
This needs Node.js + npm installed (see
Installation prerequisites).
The first run takes a couple of minutes (it runs npm install
under the hood, fetching Vite + React + Monaco + viz-js); the
incremental build itself is fast, and the script skips
npm install on subsequent runs unless package-lock.json has
changed. The output is a static dist/ directory the running
server serves directly — no Node process at runtime. Re-run
./build-webui.sh after pulling changes that touch webui/src/.
You can also run the underlying commands directly
(cd tools/forgather_server/webui && npm install && npm run build)
if you're on a single host with a single arch — but on a checkout
shared between hosts of different platform (NFS, bind mounts), use
./build-webui.sh so per-platform installs don't trample each other.
The script keeps each platform's node_modules in a sibling
.node_modules-<platform>/ directory and rotates the matching one
in before each build; see tools/forgather_server/README.md for
the mechanics.
The Docker image runs ./build-webui.sh automatically as a
post-step in docker/build, so the dist bundle is already in
place when you enter the container — no manual build needed under
that workflow.
If you start the server before webui/dist/ exists, the API
endpoints still work but the root URL returns 404 Not Found —
build the UI first, or run the Vite dev server (see "Dev mode"
below).
Starting the server
Defaults to http://127.0.0.1:8765/. Open that URL; the sidebar's
six collapsible groups (Views, Tools, Search Roots, Projects, Files)
are all closed on first boot — expand the ones you want.
Common options:
forgather server -H 127.0.0.1 -p 8765 -l INFO     # custom bind / verbosity
CUDA_VISIBLE_DEVICES=0,1,3 forgather server        # exclude specific GPUs
                                                    # from the scheduler pool
The scheduler is enabled by default — submitted jobs start dispatching immediately. Pause anytime with the ⏸ button in the sidebar header.
Accessing a remote server over SSH
If your development box is remote, use SSH local-port forwarding so the browser on your laptop can reach the server's localhost ports. The Forgather server itself listens on 8765; the services it spawns each pick a canonical default port so existing port-forward configs keep working without per-host rebinds:
| Service | Default port |
|---|---|
| Forgather server (UI) | 8765 |
| Inference server jobs | 8137 |
| TensorBoard jobs | 6006 |
| MkDocs jobs | 8000 |
ssh -L 8765:localhost:8765 \
    -L 8137:localhost:8137 \
    -L 6006:localhost:6006 \
    -L 8000:localhost:8000 \
    user@dev-host
Or persist the forwards in ~/.ssh/config so you don't have to
remember the ports:
Host dev-host
    HostName dev-host.example.com
    User you
    LocalForward 8765 localhost:8765
    LocalForward 8137 localhost:8137
    LocalForward 6006 localhost:6006
    LocalForward 8000 localhost:8000
Then ssh dev-host and open http://localhost:8765/ on your
laptop. Inference / TensorBoard / MkDocs jobs surface their served
URLs as clickable links on the running-job card; with the forwards
in place those links resolve transparently.
Heads-up: prefer
localhostover127.0.0.1when the browser is reaching the server through an SSH tunnel. They're not always interchangeable on the client. Chromebook in particular routeslocalhostthrough the tunnel correctly but hits its own loopback for127.0.0.1, which fails to connect. macOS and most Linux desktops treat the two identically, butlocalhostis the safer default for tunneled access.
Persistent state
Per-user state lives under ~/.config/forgather/server/: search roots,
queue, job records, captured TTY logs, dynamic-args overrides,
GPU policy. All files are written crash-atomically (tmp + fsync +
rename). Power-loss-mid-write never leaves a half-written canonical
file, and every reader tolerates a corrupt or truncated file by
falling back to empty state.
Next steps
With your first model trained, here are recommended paths for learning more:
Tutorials:
- Tiny Llama -- Full walkthrough of the getting-started project: TensorBoard, loss plots, text generation, and programmatic use.
- H.P. Lovecraft Project -- Learn how to create workspaces and projects from scratch, while finetuning a 7B parameter model on a single 24 GB GPU.
- Samantha -- A practical finetuning example using the Samantha dataset with Mistral-7B.
Understanding the system:
- Projects Overview -- Interactive notebook exploring the Project abstraction.
- Project Composition -- How template inheritance works.
- Configuration Syntax -- Complete reference for the YAML + Jinja2 configuration language.
- Model Architecture --
Inventory of transformer components in
modelsrc/transformer/.